Squash Guide
Squashing is a way to simplify your commits and combine multiple commits into one.
How do I squash my commits?
-
Using Github Desktop: Github Desktop will provide you with a user-friendly interface, it's mainly tailored to new software developers that are not familiar with the CLI and its uses.
-
Using Git's CLI: With Git's CLI (Command Line Interface), you can easily squash commits by 'rebasing', which is basically a way to re-write your commit history. It's an option tailored for users that have already been using Git for a while and are familiar with command line interfaces. It offers more flexibility and granularity, where a GUI may not.
Using Github Desktop
Squashing commits
Squashing commits using Github Desktop is a simple task, you can do so by following these steps:
-
Start Github Desktop
-
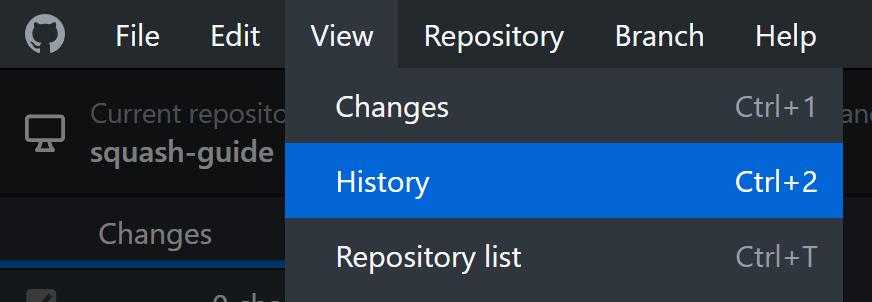
Once Github Desktop is open, head to View -> History on the topmost menu bar.
-
A history dialog showing the commits you want to squash will show. Select the ones you want to squash by holding down the
CTRLkey, orSHIFTkey if there's a lot of commits you need to squash. Followed by right clicking the selected items and clicking onSquash 'n' commits...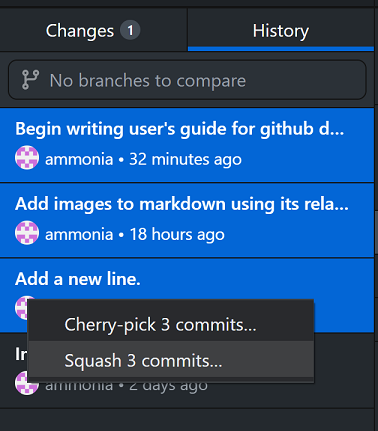
-
A message box showing combined commit messages will show, you can modify this message if you need to. Click on
Squash 'n' Commitsto continue.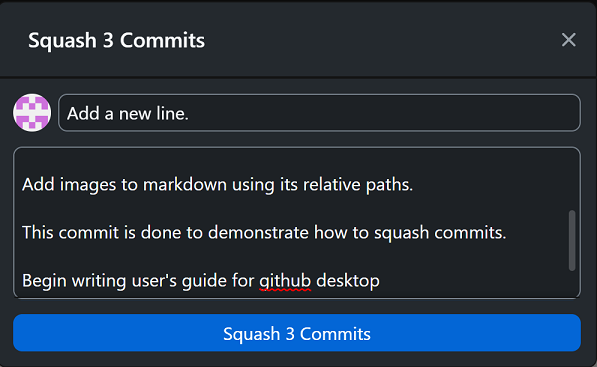
-
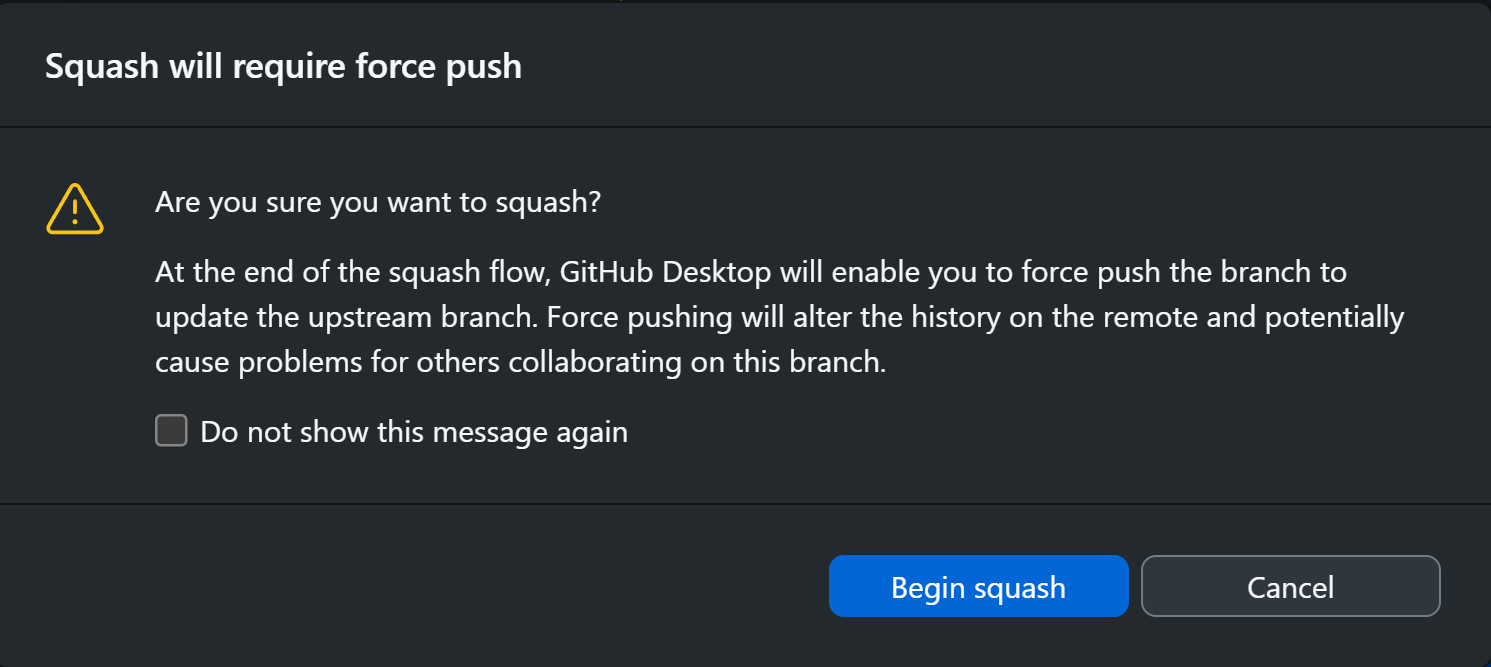
If you are pushing your changes to a remote repository, therefore re-writing commit history on the remote, you will get this message. Just click on 'Begin Squash'.
-
Prior to pushing our changes, we should verify if our commit history is correct. This means not overwriting old commit history with the commits we just made. On Github Desktop, we can find the History tab on the left. By clicking on it we can see the history.
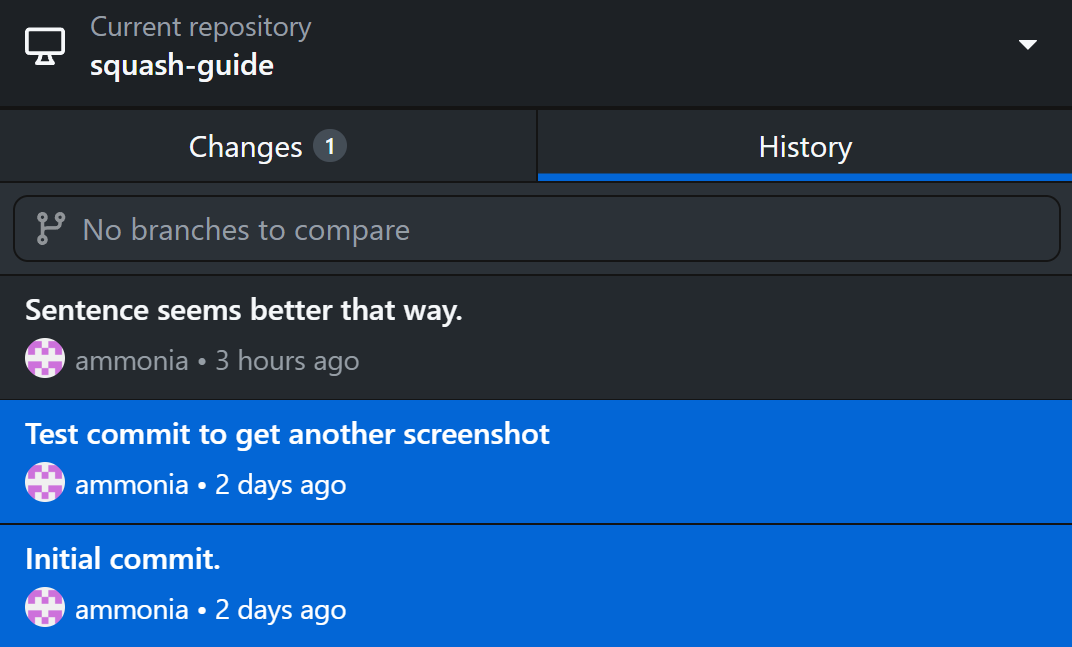
As shown in the image, our commits from two days ago (highlighted in blue) are still there, so that's good, we have kept our old commit history intact. "Sentence seems better that way" would be our newly squashed commit. With this out of the way, we can now push our changes.
-
You should now click on a button that reads 'Force push origin', located on the topmost tooltip. It may take a few seconds before this button changes to the 'Force push origin' variant.

-
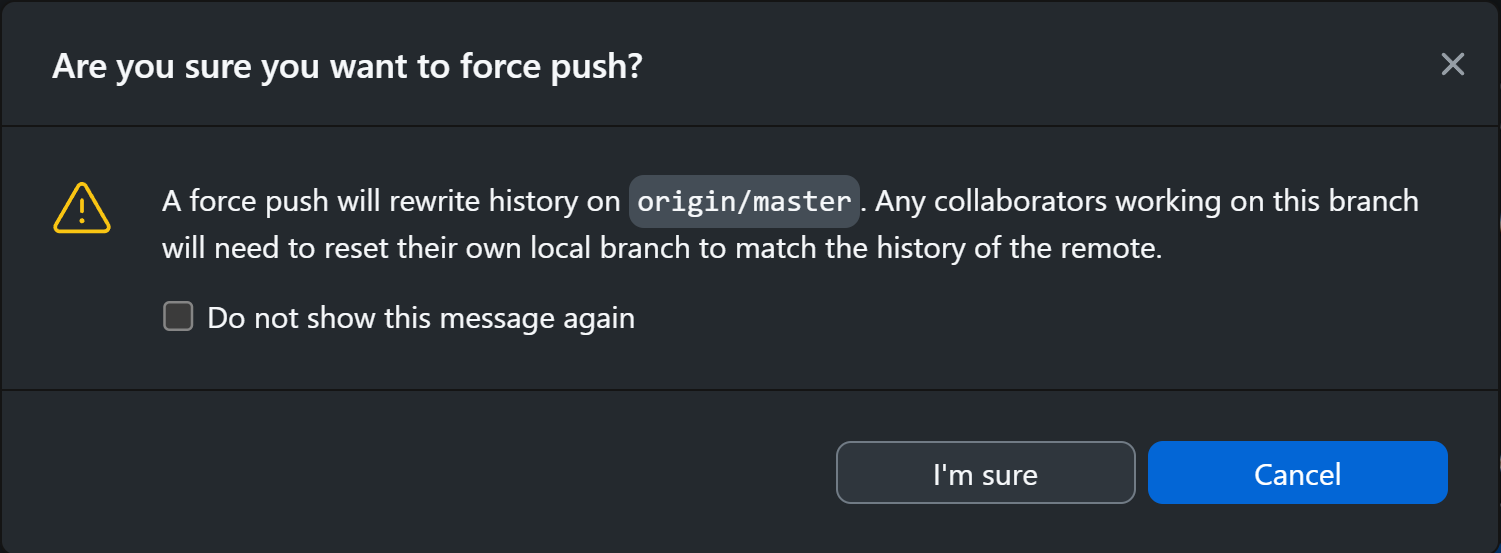
You will then get the following message box, warning you about what you're about to do and the implications it may have on any other collaborators. You may click on I'm sure if you're the only collaborator.
-
Congratulations, you have squashed/combined multiple commits.
Using Git's CLI
Prerequisites
- Git
- Basic knowledge on Git
Squashing commits
We can squash commits by using git rebase -i HEAD~n where n is the number of commits we want to combine from the HEAD commit and -i, which stands for interactive.
So essentially, one would type the following into the console if we want to combine said commits (up to head, being the most recent commit):
git rebase -i HEAD~3Doing so will show us the vim editor (or the one we have configured to use with git) where we can squash commits. For this guide, we will be using vim.
Once the editor is shown, press the insert key and change pick for squash on the commits you would like to squash/combine.
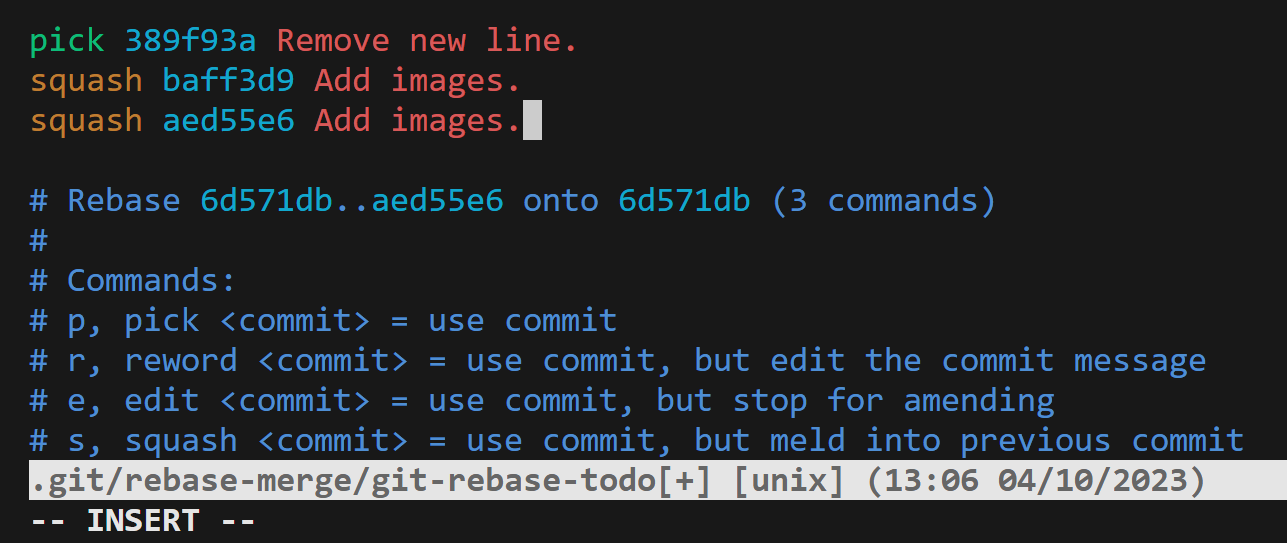
Once you're happy with your changes, press the escape key to go into normal mode, followed by typing : (a colon) to enter command-line mode. Once command-line mode is available, type wq to write (save changes) and quit.
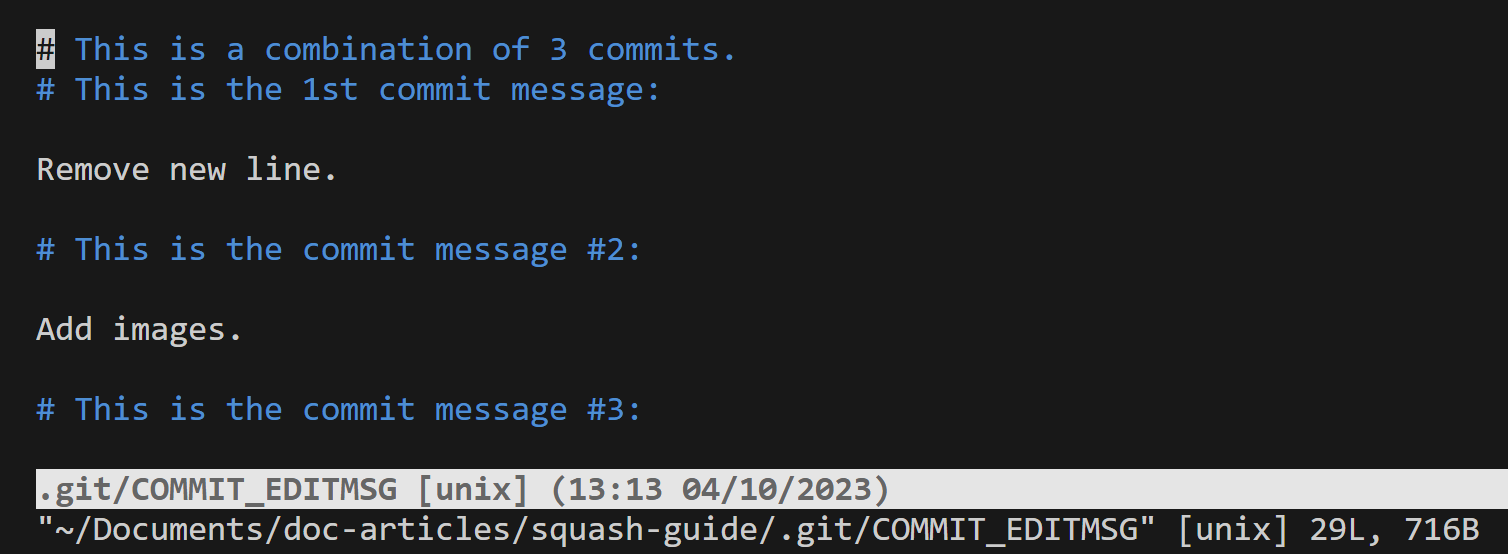
A vim dialog (as shown in the image above) will show again in the console showing all the commit messages combined (you can edit it by pressing insert), to save and exit just repeat the previous step again (which entails going into console mode and saving changes).
And that's it... Your commits should now be squashed into one.
Verifying commit history
Before you push your changes to the remote branch, you should verify if your commit history is correct. What is meant by this is essentially; you are not overwriting old commit history with the commits you recently made.
You can check this by typing git log --pretty=oneline or simply git log --oneline. You can find more about the pretty command-line argument here.
Log documentation can also be found here if you are curious about it.
If the commit history looks correct (meaning commits before yours are still there) you can go ahead and push your changes.
Pushing your changes to the remote branch
You can now push your branch to the remote repository, to re-write your commit history remotely (in case you need to do so) you can do git push --force-with-lease which is less destructive than git push --force since it will prevent you from overwriting any new changes done by others, this is useful if you are working with other people.