Rebase Guide
Rebase or 'rebasing' is great for updating your branch to be up-to-date with another branch, this is done by picking a new 'base' for your working branch and apply all the changes you made on top. This is ideal when you made changes, let's say, a year ago and merging those are no longer viable as a result of merge conflicts or it would no longer be called if it was actually merged. You can rebase it instead, resolve any merge conflicts, test if it still works, and update or apply for another pull-request.
To clarify:
- Rebasing does not change the content of the original commits in the master branch (or the commits thereof).
- Rebasing adds new commits on top of the master branch, effectively extending the branch's commit history with the changes from the feature branch.
- Rebasing does not create an additional merge commit.
The original commit history of the master branch is preserved, and new commits from the feature branch are added (or replayed) on top of the tip of the master branch (also known as the most recent commit), creating a linear history.
Prerequisites
Ways to Rebase
Rebasing using a GUI
Rebasing using GitHub Desktop
-
Update your master branch to be in sync with our repository:
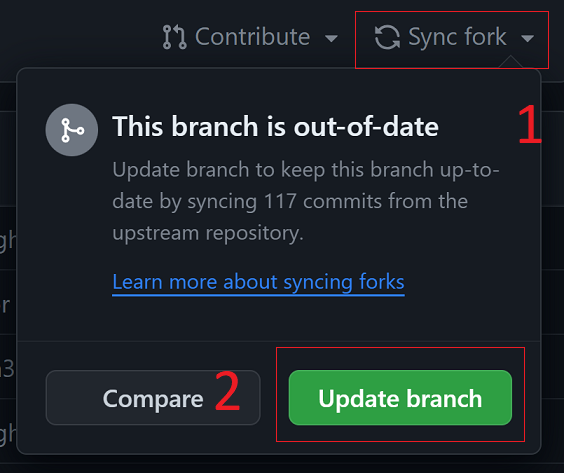
- Via browser and GitHub: go to your fork of the FiveM repository and press
Sync fork, followed byUpdate branch.
-
In GitHub Desktop press
Fetch originfollowed byPull origin, if any new changes are available.

-
Your master branch is now up-to-date with our repository and can be used as your new base.
- Via browser and GitHub: go to your fork of the FiveM repository and press
-
Rebase your working branch in GitHub Desktop:
-
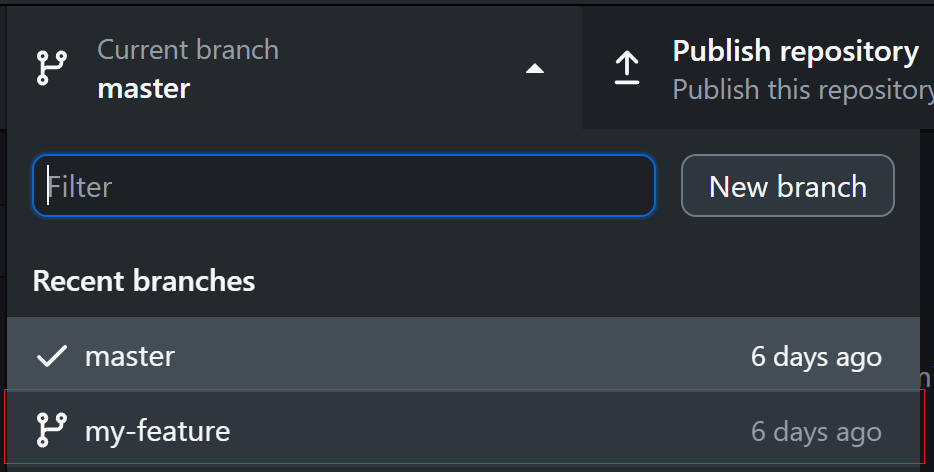
Switch to the branch you want to rebase, in this example we use
my-featureas our branch name.
-
Once you're on the
my-featurebranch you want to rebase, go toBranchin the top menu bar and chooseRebase current branch.... -
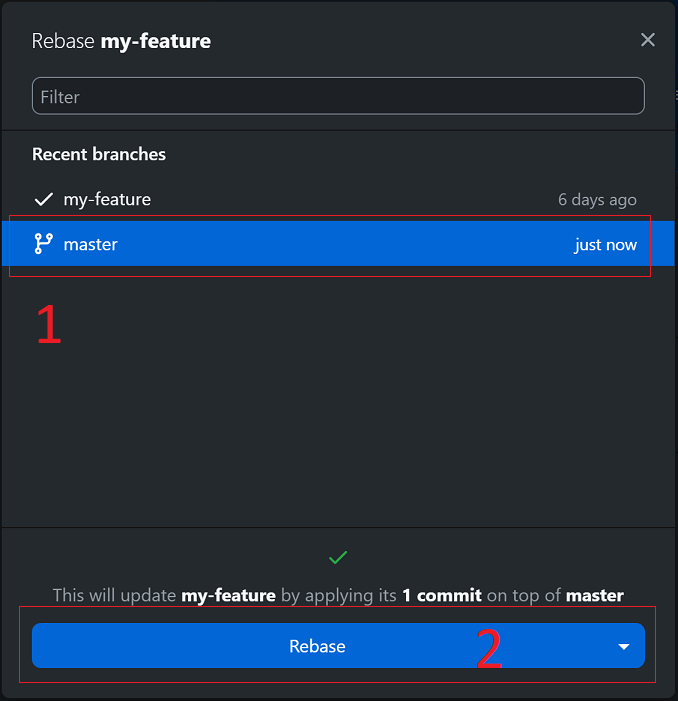
It'll show you a window with all available branches to rebase it to, pick
master. -
The same window will show you that it will update our
my-featurebranch by applying itsxcommits on top, make sure the amount of commits is the same as the commits you applied.
-
Hit
Rebaseand it will pull in all commits of the master branch and then put your commits on top.- If there are any conflicts, you'll be prompted and you'll need to resolve those.
-
Test if your code still compiles and that the changes are working as expected, adjust otherwise.
-
Now you can force-push your
my-featurebranch to GitHub- If you made extra changes then the force-push option is probably gone, you can go into the CLI and type
git push --force-with-leaseor to get the button back in GitHub Desktop you can right-click on the last commit, hitAmend Commit...and confirm the amendment without any changes, it'll show the force push option again.--force-with-leaseallows you to push changes safely when working with other collaborators. You may want to usegit push -fif you're the sole contributor. - Any open PR will be automatically updated.
- If you made extra changes then the force-push option is probably gone, you can go into the CLI and type
-
Rebasing using Visual Studio Code
-
Launch Visual Studio Code
-
Switch to the branch you want to integrate changes to:
-
On the bottom left corner of the Visual Studio Code window you should see a button, click on it and select the branch you want to check out to. We're going to choose
my-feature.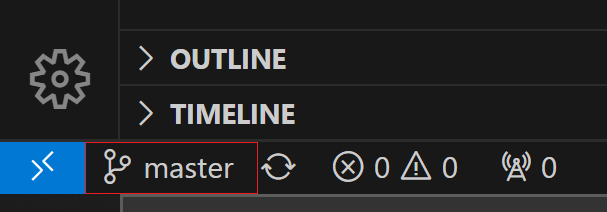

-
-
Now that you're on the branch you want to integrate your changes onto, click on
Source Controllocated on the left navigation bar. -
Once you're on
Source Control, click on three dots (...) -> Branch -> Rebase Branch...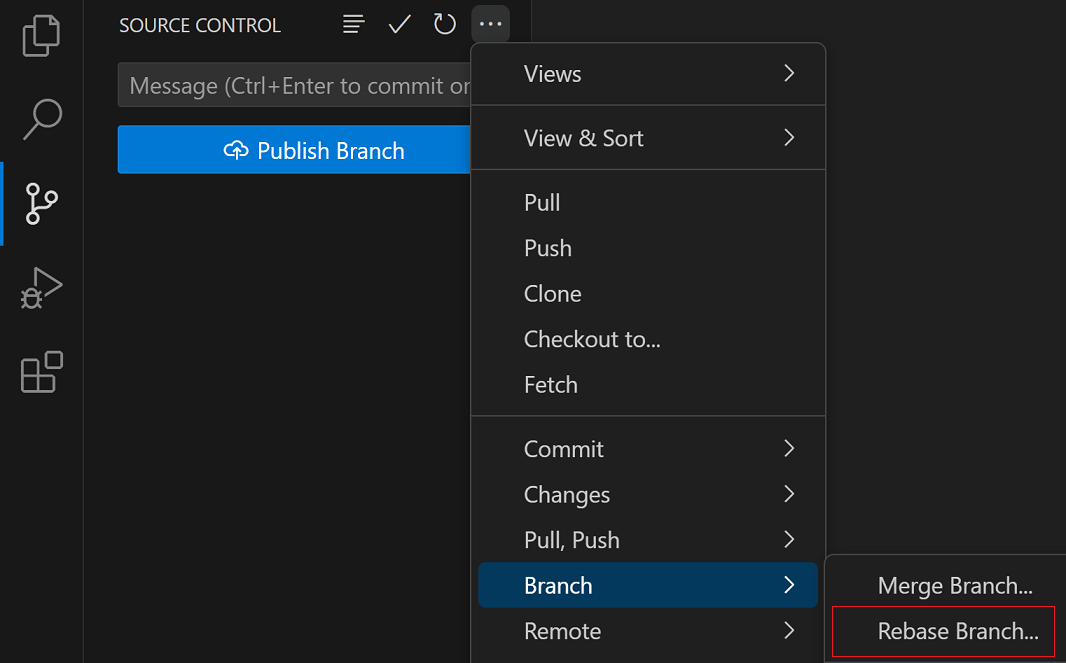
-
Let's pick
masterby clicking on it for this tutorial.
- If there are conflicts, you will be prompted to resolve those in order to continue with the rebase process.
-
Test if your code still compiles and that the changes you made are working as expected, adjust otherwise.
-
Now you may force-push your
my-featurebranch to GitHub usinggit push --force-with-lease, that's because you may be working with other collaborators that also happen to be working in the same branch (so you don't overwrite their changes). You may usegit push -fotherwise.
Rebasing using Git's CLI
To transfer all the commits from the feature branch into the master branch using rebase, you can follow these steps:
-
Update your master branch to be in sync with our repository (switch to the master branch if you're not on it, using
git switch master):git pull upstream/masterYour local master branch should now be up to date with our repository. Now you should push those changes back to your GitHub remote repository using the following command so your local changes are reflected on the remote:
git push origin master -
Now switch to the branch you want to rebase, for this example we're going to use
my-feature, fetching may be needed if you don't have the branch locally yet (for this use case, we will assume you don't):git fetch git checkout my-feature -
Now we will rebase our
my-featurebranch by taking the changes made inmasterand applying them intomy-feature.git rebase masterThis will integrate the commits from
master(which is specified as a target in the command up above) into yourmy-featurebranch and putmy-feature's commits on top of those, while maintaining the continuity of yourmy-featurebranch's history. -
If there are merge conflicts between the
my-featureandmasterbranches, the rebase process will be paused and you will be asked to resolve said conflicts. Once the conflicts are resolved, you may run the followingGitcommand down below.git rebase --continue- You may need to repeat the previous step multiple times depending on the amount of conflicts between branches.
-
Test if your code still compiles and that the changes you made are working as expected, adjust otherwise.
-
Now you may force-push your
my-featurebranch to GitHub usinggit push --force-with-lease, that's because you may be working with other collaborators that also happen to be working in the same branch (so you don't overwrite their changes). You may usegit push -fotherwise.
What will the changes look like?
Once you complete the steps (regardless of the guide you chose), all the commits from the master branch will be added to the my-feature branch, and the commit history will be linear. The original history of the master branch will remain intact, and it will look as if the work done in the feature branch was developed directly on the master branch.
CLI
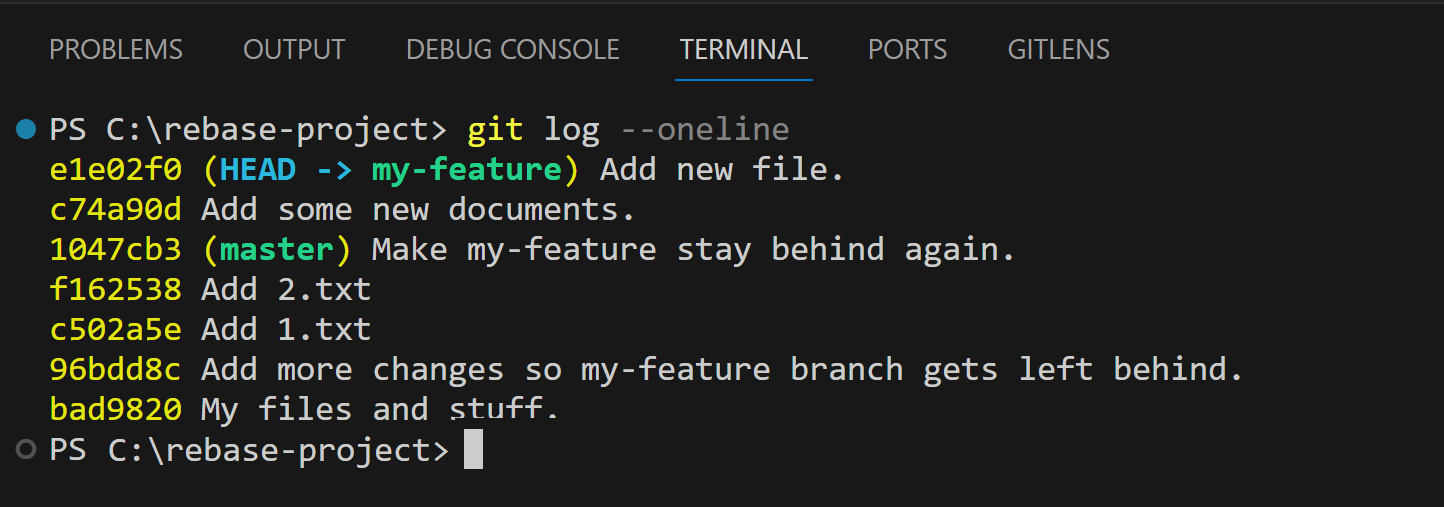
This is how the commit log would look (using oneline parameter)
6724b52 (HEAD -> my-feature) Add more screenshots.
96bdd8c (master) Add more changes so my-feature branch gets left behind.
bad9820 My files and stuff.
Commit 6724b52 indicates within parentheses that said commit was rebased from the my-feature branch.
GitHub Desktop
On GitHub Desktop, you can view the change history (similar to the git log CLI command, but with a GUI) by going to the left pane and clicking on the History tab.
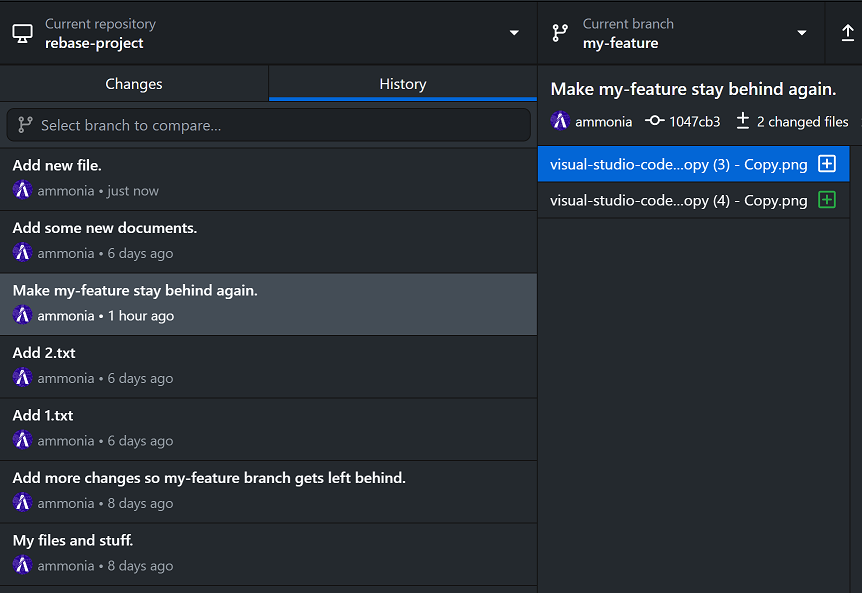
Visual Studio Code
While Visual Studio code doesn't have a way to view a detailed list of changes from its GUI, you may still view timeline changes on files by clicking 'Explorer' on the left pane at the top and clicking on a specific file under the 'TIMELINE' view.
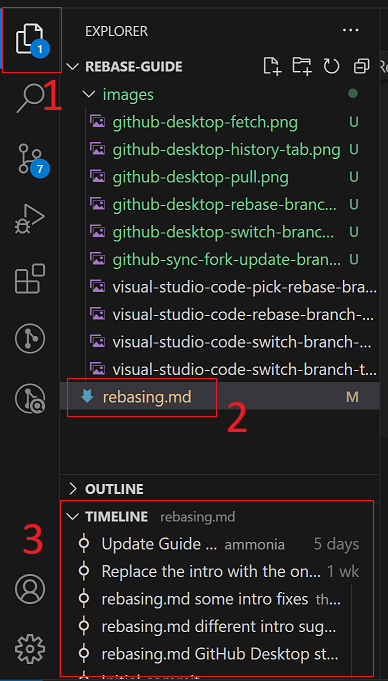
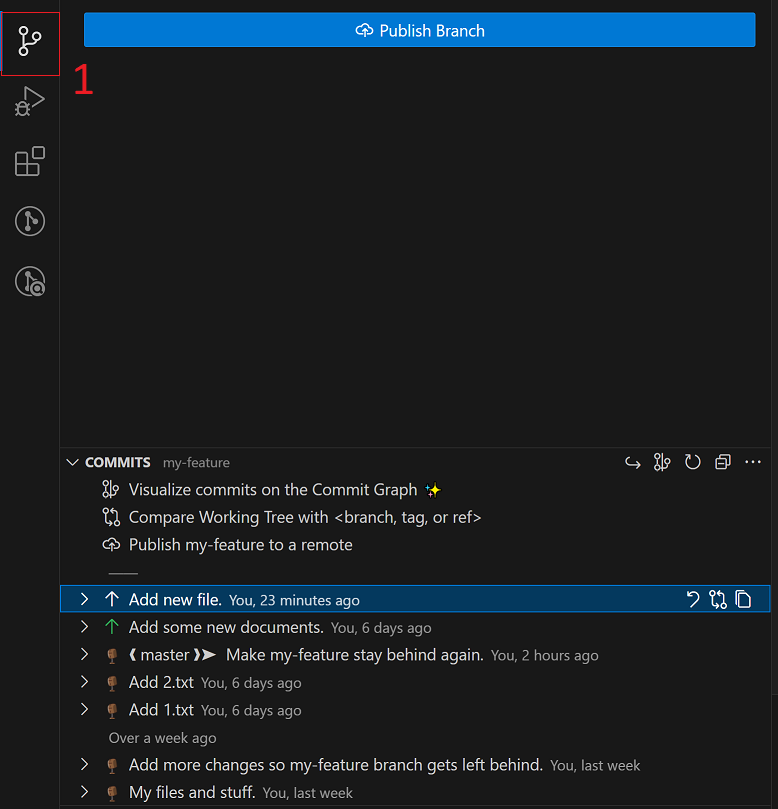
Note: Image doesn't match the previous commit history, it's mainly being used for demonstration purposes only.
Extension: GitLens
You may also install an extension such as GitLens to see the commit history and access the commit log by going to Source Control -> Commits.
Terminal
Last but not least, you may see the commit history by opening up the terminal and typing git log. You may also type git log --oneline to see the commits in a compact fashion.
You can open the terminal by going to the topmost menu bar, clicking on Terminal, proceeded by New Terminal.
Hint: You may also open the terminal by using its hotkey
CTRL + SHIFT + `. The last key is backtick for users with a different keyboard layout.
